Monday, January 30, 2012

Sausage, Peppers, and Onions

I have a folder full of recipes, that I have printed of the web and never tried. Yesterday, I decided to try one. Of course, I made a few changes to it, but the recipe turned out extremely well. It's now being shifted into my permanent recipe file. The original recipe is on Simple Recipes website, but I added a few more herbs and increased a few quantities, to make this recipe for flavorful and more suitable to my taste.

Sausage, Peppers, and Onions

2-3 oz penne pasta
1 pkt polish Kilbasa, cut into 1inch pieces
2 tbs olive oil
1 green pepper, sliced into long strips
1 red pepper, sliced into long strips
1 yellow pepper, sliced into long strips
4 garlic cloves, sliced into slivers
1 lrg white onion, cut into wedges
1 can diced tomatoes, Italian style
1 tbs dried oregano
1 tsp dried basil
3/4 cup red wine
1 tsp red pepper flakes
Salt to taste
Pepper to taste

Cook the penne until al dente and set aside. Heat the oil in a pan with a lid; when hot add sausages and allow them to brown on all sides, remove and kepp aside. Put the peppers and onions into the pan, and allow to brown, almost singe it. Add the garlic and allow it to brown. Next add the red wine, and allow it to reduce by about half. Now add the tomatoes, oregano, basil, pepper flakes, salt, and pepper. Stir it in well, add the sausages, cover and simmer for about 5 - 10 mins. Switch off the stove, and add in the penne. Serve hot!

Friday, January 27, 2012

Roasted Butternut Squash

Roasted Butternut Squash
Butternut Squash is one of my new found loves. I'd never eaten one until recently and I love the stuff. My biggest problem with it is that I can never tell if its ripe or not, until I cut into it. So I end up buying them and then letting them sit on my shelf for anything between 2 weeks to a month. Then I get fed up of looking at it, and decide to cut it open and take the risk. It is usually extremely difficult to peel, but when it's open it seems, perfectly ready to use. So I never know if I'm feeding my husband unripe butternut squash or not. Either way, we both really love this recipe and it makes for a super, easy side dish.

1 butternut squash
Salt to taste
Pepper to taste
Chili powder to taste
Little oil

Preheat the oven at 350 degrees Fahrenheit. Peel, de-seed, and cut the butternut squash into chunks. In a bowl, spray the squash with a little oil, then sprinkle the salt, pepper, and chili powder over it. Toss till well mixed, and put into a greased oven proof dish. Bake for about 45 - 60 minutes. The squash, when cooked, should be soft. If you want to add a little color to it, turn the oven onto broil and the heat up to 450 degrees for a few minutes. Serve Hot!

Thursday, January 26, 2012

Masala Dal

If you know Indian cuisine at all, you’d know that Dal is one of the staple foods. For its price, it can do a long way, and can be cooked in hundreds of different ways. I, personally, don’t think I know more than 5 to 8 recipes. And every little while I change an ingredient, and the dal gets a completely new flavor.

As I had mentioned in the Patla Masoor post, there are several different types of Dal, and this one is called Toor [pronounced: too-arr] Dal. It’s a yellow dal and the packet I buy says its English name is Split Pigeon Peas. In India, you can buy these dals, dry or in oil. I have never dealt with the oily kind, never seen it at the Indian store here, and have no idea how to clean it etc., so I would suggest sticking to the dry packets. 

Masala Dal

2 cups Toor dal
1 medium onion, chopped
3-4 cloves garlic, finely chopped
1 tsp (heaped) garlic paste
1 tsp (heaped) ginger paste
1 tsp turmeric powder
2 tsp chili powder
2 tsp cumin powder
2 tsp coriander powder
Salt to taste
3-4 dry red chilies (whole)
½ tsp garam masala
Little oil

In a bowl, soak the dal for about 15-20 minutes. Drain before you put it in the cooker.

In a pressure cooker, heat a little oil and brown the onions. Once they start to brown, add the chopped garlic and the ginger and garlic pastes. Next add the salt, turmeric, chili, coriander, and cumin powders as well as the garam masala. Cook it until the raw smells go, then add in the dry red chilies. Now stir in the dal so that it’s well mixed, and then add water. Put only enough water to just about cover the dal.

Put on the lid and whistle, and cook it on medium-high heat, till the whistle blows. Switch off the stove, let all the steam out and open the cooker carefully. Check to see how much water is in there. Add more water if needed, and then cook again on medium-high heat until the whistle blows. This time, do not open the cooker. Switch off the stove and allow the pressure to go down on its own, as the cooker cools. The dal should be cooked, but still hold its shape. It should not be completely mushy, and paste-like, and at the same time, it should not be crunchy at all. Add more salt, if needed, and serve hot with chapatti or bread.

Toor Dal

Notes:

* IF YOU ARE USING A PRESSURE COOKER, PLEASE FOLLOW ALL INSTRUCTIONS THAT COME WITH THE COOKER. IT CAN BE VERY DANGEROUS IF NOT USED PROPERLY! My recipe instructions are written with the assumption that you know how to use one and this blog is not responsible for your use of a pressure cooker. Every cooker has a slightly different cooking time, and water absorption. If there isn't enough water in the cooker, your dal will burn and cleaning that cooker is a pain in the backside!

*Dry red chilies are available at most Indian stores. They are extremely, extremely spicy. When you handle them, make sure you wash your hands immediately after, and do not rub your eyes without washing your hands. For this recipe, the chilies do not have to be cut, slit, or deseeded. They just go straight from the packet, into the cooker. If the chilies in the packet are broken, just put an estimate of the quantity. 

Stir-Fry Vegetables

One of the nicest parts of cooking in America is all the frozen foods and vegetables. I know, the fresh stuff is way more healthy and much better for you, but the frozen vegetables makes life so much easier, especially when you’re planning to use several different vegetables in one dish. Take for instance the stir-fry vegetable packets I’ve used in this recipe.  The packet contains broccoli, sugar snap peas, grated carrots, mushrooms, green beans, celery, onions and red peppers. Using it is easier and cheaper than buying all these ingredients separately.  So there you have it, my defense for frozen vegetable packets. And here is the recipe for stir-fry vegetables.

Stir-Fry Vegetables

3-4 oz thin wheat spaghetti
2 pkts (frozen) stir-fry vegetables
1 pkt (frozen) 3 Pepper and Onion
3 tbs soy sauce
3 tbs Worchester sauce
1 tsp (heaped) ginger paste
6-8 cloves garlic, finely chopped
1 tbs ketchup
¾ cup red wine
1 tsp sirachi (chili) sauce
2 tsp hoisin sauce
1 tsp (heaped) sweet orange marmalade
Pepper to taste
Little olive oil

Break the spaghetti into 2 inch pieces. In a pot of boiling water, with a little oil and salt, cook the spaghetti until al dente. 

In a separate pot, heat a little olive oil and fry the chopped garlic and ginger paste till it starts to brown. Add in the packet of 3 pepper and onions and allow it to cook till the onions start to become soft and transparent. Now stir in the soy, sirachi, hoisin, Worchester sauces and ketchup. Once properly stirred in, add the stir-fry vegetables. Mix them well, then put in the red wine and cover till vegetables cook, stirring occasionally. Once the vegetables are done, cooked but still a little crunchy, stir in the marmalade and the pepper, and simmer for a minute or two. Now switch off the stove, and stir in the drained spaghetti until it’s well mixed. Serve hot.

Notes:

*The 3 Pepper and Onion packet is about ½ a red, yellow, and green pepper each and a medium onion, all sliced length-wise.

*Adding a little oil to the spaghetti while it’s cooking, will stop it from sticking and making it one big lump of spaghetti. A teaspoon is all you need to add. 

Monday, January 23, 2012

Garlic Chili Scrambled Eggs

I am the opposite of most people, when it comes to cooking schedules. I don't work right now, and so I have all day to spend in the kitchen, during the week. And on the weekend, I get lazy about cooking, and busy doing house stuff with the husband, we also tend to eat out on the weekends. So most weekends, I only cook dinner on Sunday, and we survive on sandwiches and breakfast foods like pancakes, waffles and eggs for lunches. We are both extremely fond of scrambled eggs, and make a huge variety of them; however, these garlic chili eggs are one of our favorites.

Garlic Chili Scrambled Eggs

4 eggs
5-6 cloves garlic, finely chopped
2-3 chilies, finely sliced (increase or decrease quantity, based on your tolerance for chilies)
1/2 cup milk
Salt to taste
Pepper to taste
1-2 tsp olive oil

In a bowl, whisk together the eggs, milk, salt, and pepper and set aside. In a saucepan, heat up the oil, and put in the garlic and chilies. Fry till they start to brown. Watch the garlic closely, because it will go from brown to burnt very fast. As soon as it starts to brown, add in the egg mixture and cook to the consistency you like. Serve hot with toast, bacon or any other breakfast foods!

Saturday, January 21, 2012

Chicken Lemon Soup

I am a strong believer in chicken soup for someone with a cold or flu. It’s just that wonderfully, comforting feeling of hot soup going down your throat, soothing the itchiness as it goes along, that makes me want it. So as soon as that itchy feeling starts, I have to make chicken soup. I add the chilies to give it a kick; nothing helps open your sinuses like a little spice.

I used the basic chicken soup recipe from this month’s ‘Everyday with Rachael Ray’ but added a whole lot of stuff, to make it more flavorful. I would have preferred to use chicken with bone in for this recipe, but I only had boneless breasts at home, and felt lazy to wonder out into the snow and cold. I would go with chicken with the bone in, especially all those backs with very little meat on them, they really release that nice meaty taste.

Chicken Lemon Soup
1 pnd chicken pieces
1 bunch carrots (about 5-7), skinned and cut into pieces
1 bunch celery (about 8-10 stalks), leaves removed, cut into pieces
1 onion, medium sized, chopped
1 green pepper, cut into large squares
2-3 green chilies, slit lengthwise (optional)
3 cans chicken stock (about 1.5 liters)
3-4 whole black peppercorns
1 whole cardamom
2-3 whole cloves
1X1 inch stick cinnamon
Salt to taste
1 lime’s juice
½ tsp powdered thyme


Cut all vegetables to approximately the same size. In a soup pot, put in the onions, carrots, celery, and pepper, until the vegetables on the bottom start to brown. As soon as they do, add in the chicken stock and pieces. Put all the whole spices (cardamom, cinnamon, cloves, and peppercorns) into an herb bag and immerse it in the pot. Try to cover the entire bag in stock. Put a lid on the pot, reduce the heat to low, and simmer for an hour, until all the vegetables are soft.

Once the stock is ready, add the green chilies and simmer for another 20 minutes. Next remove the chicken and shred using two forks. Set aside.  Remove the vegetables and chop them fine. Add the chicken and the vegetables back into the stock. After that stir in the thyme powder, and the lemon juice, and bring to a boil. Remove the herb infuser. Serve hot with toast or croutons and get well soon.

Thursday, January 19, 2012

Broccoli Rice

I really enjoy making these types of one-pot dishes, not only because they are quick, but they also help me empty my fridge of vegetables. Plus, this gives our palates a nice break from all the Indian spices and flavors. Once again, I would prefer to put lots of cheese in this recipe, but my husband’s lactose-intolerance makes me hold back. Try it and let me know what you think.

Broccoli Rice

2 cups brown rice, cooked
1 head broccoli, divided into flowerets
1 pkt frz mirepoix vegetables
3-4 cloves garlic, finely chopped
1 tsp dried oregano
1 tsp dried marjoram
½ tsp dried thyme
Salt
¼ cup dry white wine
½ tsp sirachi sauce (or other chili sauce)
1 can cream of mushroom soup (condensed)
1 can cream of chicken soup (condensed)
½ soup-can milk
1 cup shredded cheese (optional)

In a pot, on medium heat, heat a little oil, and then put in the mirepoix mix. After you see the onions start to become transparent, add the garlic, dried herbs, chili sauce and wine. Allow the herbs to cook a little, after which, add the broccoli. Once the broccoli starts to cook, add in the soups and milk, and simmer till the carrots and broccoli are cooked. Add cheese if you like. Switch off the stove once the soups have reached a desired consistency and mix in the rice. Serve hot, hot, hot!

Notes:

*Mirepoix vegetables are a mix of onions, celery and carrots that are usually used in making stock and soup. I buy it frozen to save time and effort.

*I often add leftover carrots, celery, peas, cauliflower, even peppers to this dish. Basically, whatever you might have in the fridge.

*Make sure the brown rice is cooked properly, otherwise the rice will be crunchy

*While talking to my Dad this morning, he suggested adding a can of tomato soup to this recipe, to make it more risotto-like. If someone tries this, please let me know how it turns out! 

Tuesday, January 17, 2012

Easy Pork Curry

When you mention Indian food to anyone living outside the sub-continent, the first thing they think of is curry. Curry is a really broad term in India. Different parts of the country have different curries. You get curries made with coconut milk, and some made without, several areas even call a drier, spicy vegetable, like my Cauliflower recipe, a curry.  My favorite curries are Goan Curry, and Badam (Almond) Curry, both of which I have not made yet. Making a curry from scratch is actually quite a laborious process. One had to grind the spices together, roast them on a high flame, soak and squeeze out the coconut milk from a couple of dried coconuts etc… Tons to do, really.

But I live in the US, and that makes my curry-making-life easier. :) We get canned coconut milk at the Indian store, and the curry masala I use comes out of a tin, making this a quick and easy recipe.

Easy Pork Curry


1 pnd pork pieces (the size of stew pieces)
1 large onion, chopped
1 (heaped) tsp ginger paste
1 (heaped) tsp garlic paste
½ tsp turmeric powder
½ tsp chili powder (add more if you like it hot)
5-6 tsps BOLST’S Mild Curry Powder
Salt
2 (13oz) cans coconut milk
Little oil

          Clean and marinate the pork in a little salt, and keep aside. In a pot, on medium heat, heat a little oil and fry the onions till they brown. Add the ginger and garlic pastes and allow it to cook a little. Next put in all the spices. After they cook for a minute (till the raw smell goes) add the pork, and let it brown on the outside a little. Once the pork starts to brown, stir in the coconut milk and let it simmer till the pork is cooked. Ta-da! Your meal is ready! Serve with rice, preferably basmati, and kachumber.


Note:

*You can use any meat or seafood you like, with this recipe. If you’re vegetarian then put in half cooked potato pieces, or a vegetable like cauliflower or broccoli, or even tofu.

*The more coconut milk you add the creamier it tastes. If you do not want to make it so creamy, then substitute half the coconut milk for water or stock. Make sure you use coconut MILK and not coconut water. 

Sunday, January 15, 2012

When-In-Doubt Pasta In White Sauce

There are days when I have cooker’s block! Yes, I just made that term up. It’s when I have no idea what to cook, nothing in my recipe book, folder, and file appeals to me, and there isn't enough time to browse through random recipes online. This is when I turn to pasta.

My husband is not a big fan of pastas. He’s lactose-intolerant and finding tasty pasta recipes without cheese in them is close to impossible. So, I usually come up with my own recipes, and they are generally in a white sauce. For this recipe I've used Penne, but I prefer Farfella (the bow-tie looking one). Here is what I made for dinner Friday night.

Pasta in White Sauce
8oz (About 200gms) Penne
1 (full) chicken breast, cut into approximate 2 X 2 inch chunks
1 zuchinni, cut into chunks
1 red or yellow pepper, diced
1 bunch green onions, diced
2-3 cloves garlic, finely chopped
1 heaped tsp dried oregano
1 headed tsp dried thyme
1 heaped tsp dried marjoram
Salt to taste
Pepper to taste
Chili Flakes (optional)
1 cup (shredded) cheddar cheese (optional)
1 cup milk
1 tbs flour
Little olive oil

In a saucepan, bring some water to a boil, with a little salt and a teaspoon of olive oil. Once it’s at a rolling boil, put in the pasta and cook till almost al dente. Switch off and keep. The hot water will continue to cook the pasta until it cools down, which is why you must switch it off before it is fully cooked. 

In a bowl, mix together the flour and milk, and set aside. In another bowl, marinate the chicken pieces with about a teaspoon each of salt and pepper.

Heat a little olive oil in a pan on medium heat. Once it’s hot, put in the chopped pepper and green onion. Fry it a little, till the green onion starts to brown and the pepper starts to soften. Then add the garlic and cook till it browns. Add the herbs, chili flakes, salt, and pepper and cook for about 30 seconds. If it starts to stick or burn, use a little water from the boiled pasta. Next put in the chicken and allow it to brown slightly. When the chicken is half cooked add the zucchini. Now add the milk mixture and let it heat up and start to thicken. Add cheese if you wish to. Bring the sauce up to the consistency you like. Switch off the stove. Drain the pasta and mix it in with the chicken in white sauce. Serve hot with a salad. If you’re not lactose-intolerant, sprinkle with grated Parmesan.

Note:

*The pasta should have a generaous coating of white sauce, it should not be floating in it.

*I keep the skin on the zucchini, cut of the ends, slice it into quarters length wise, then cut it about ½ an inch thick. The zucchini pieces should be about ½ the size of the raw chicken pieces.

*I use lactose-free fat-free milk, but using whole milk will make it a lot creamier and tastier. 

Friday, January 13, 2012

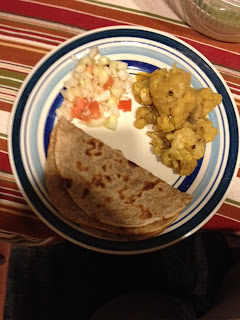
Kachumbar

Kachumbar is a salad we eat as an accompaniment to other foods like Patla Masoor, or other dals etc. There are several variations to it, and every family, seems to have a special way of making it, or a special ingredient in it. Here is ours.

Chop as finely as possible the following ingredients

1 medium onion
1 medium tomato
1/2 bunch cilantro (remove the stalks and use the leaves only)
1/2 cucumber (optional)

Mix all these veges in a bowl with salt, pepper and sugar to taste. Serve with food!

Nice and easy, isn't it! I like to prepare this about an hour before we eat, because the veges release their juices and the water that collects at the bottom of the dish is my favourite part.

Patla Masoor

 I've watched a lot of Cupcake Wars on TV this December and it's got me trying all kinds of cupcakes. My problem though, is that if I keep making them, then I keep eating them. So I told a friend of mine, that every time I make cupcakes she and her husband need to come over for dinner so that we can eat them together, for dessert. Luckily, she thought this a good idea too, which brings me to today's recipe: Patla Masoor – our dinner before the cupcakes! And just so you know, the recipe I found online, for those cupcakes, isn’t worth putting up here.

What is masoor? It’s a lentil (Dal in Hindi) that is commonly used in Indian cooking, and is my husband’s favorite dal. I'm pretty sure he could eat it four days a week, every week, for a year, before asking for something else. I feel like it's the meatiest dal in flavour, which makes this a nice vegetarian dish. It can be found in different colours, and as whole lentils or split lentils. For this recipe we use whole masoor with the skin on. The packets I buy have the name ‘Masoor Matki – Whole Baby Lentils’ on them. The dal looks grayish brown, with a pink tinge.

Masoor takes extremely long to cook if you do not have a pressure cooker, so I would suggest cooking it in a slow cooker if you have one, or be prepared to boil it for at least an hour or two. Masoor also cooks faster and better if you soak it in water for a while. I'd say anything between ½ an hour and 2 hours would be a good soaking. 'Patla' means thin in Hindi, and the masoor we are making is kind of soupy. 

At the bottom of this recipe are a few notes, if you’re using a crock pot or a slow cooker then follow the instructions in the notes. To make this easier and more understandable, I’ve made the instructions into points.

2 cups masoor dal
1 large onion (chopped)
1 (heaped) tsp garlic paste
1 (heaped) tsp ginger paste
1 tsp chili powder (add more if you like it spicy)
1 tsp turmeric powder
5 (heaped) tsps BOLST'S Curry Powder (mild)
2-3 whole green chilies, with a thin slit in them (optional)
1 bunch cilantro (finely chop leaves only, discard stalks)
Salt to taste
Little Oil
Water or Stock to cook the masoor

1. In a pressure cooker, fry the onions in a little oil, till they start to turn golden brown. 
2. Then add the ginger and garlic pastes and let them cook a little (till the raw smell goes). 
3. Next put in all the spices and salt, and let them cook a little. Then add the chilies. 
4. Drain the masoor, and add into the cooker. 
5. Cover the masoor with water, there should be about 1/2 an inch of water over the masoor; put on the lid and the whistle. Turn the stove up to medium-high, and allow the whistle to blow once.
At this point, you can switch off the stove, let the steam out of the cooker, and then open it. The dal will not be fully cooked, but this gives you an opportunity to see how much water is left and to see how much cooking is still needed. Add more water, if required, then put the cooker lid, and whistle back on, and turn the stove on to medium. Allow the whistle to blow again, then switch off the stove, and leave the whistle and lid on for at least 20 minutes, or till the pressure has completely gone.
Open the cooker and check if the masoor is cooked enough, and if there is enough spice and salt in it. Cooked masoor should be soft when you take a bite, and not crunchy or hard at all. If it's not cooked, put on the whistle and cook again, making sure there is enough water in the cooker. If you feel the dal has dried up, add more water or stock, until you get the consistency desired.
6. Once cooked, add in chopped cilantro and serve hot with rice and Kachumber

Masoor Dal


Notes:

* IF YOU ARE USING A PRESSURE COOKER, PLEASE FOLLOW ALL INSTRUCTIONS THAT COME WITH THE COOKER. IT CAN BE VERY DANGEROUS IF NOT USED PROPERLY! My recipe instructions are written with the assumption that you know how to use one and this blog is not responsible for your use of a pressure cooker. Every cooker has a slightly different cooking time, and water absorption. If there isn't enough water in the cooker, your dal will burn and cleaning that cooker is a pain in the backside!

*To cook this in a slow cooker/ crock pot, do steps 1 to 3 in a pan, and then put all ingredients in the slow cooker. Make sure you add plenty of water or broth, because the masoor absorbs a lot of water. Once it's cooked, follow step 6.  

*I usually use stock, chicken or vegetable, instead of water to add more flavour to the dish. 

*BOLST'S Curry Powder can be bought at most Indian stores. It is a very mild powder, and if you feel like your masoor tastes very watered down, then add a little more powder at the end and let it come to a boil - that would be enough time to cook the curry powder. 

Thursday, January 12, 2012

Indian Style Cauliflower

For anyone who doesn't know me, I'm Indian. Yet our food is a little different from stereotypical Indian food; because I'm also a Zoroastrian and a Parsi. Who and what is that? Long story short - My ancestors fled Persia and the invasion of the Ottoman Turks about 1500 years back and ended up in India - Gujarat to be precise. The Gujarati's called us Parsis (People from Persia) and the name stuck. So our foods have a slight Gujarati touch to them, even though it's been generations since we've lived in Gujarat. We do have several dishes that are unique, to us as Parsis, but I have no idea whether those dishes are rooted in Gujarat or Persia. Not being very helpful and informative, am I? 


Anyway, back to the Cauliflower. This is an easy and tasty dish that you can adjust to your palate. We grew up eating it, and any vegetable you used with these basic condiments lent it a different flavour, almost making it a completely different dish. I use frozen or fresh cauliflower for it, depending on the season, and how much of a hurry I'm in. 

1 large cauliflower head, cut into florets, and greens removed
1 large onion, chopped
1 tsp (heaped) ginger paste
1 tsp (heaped) garlic paste
2-3 segments garlic, finely chopped (Optional - Depends how much you like Garlic)
1 tsp (leveled) turmeric powder
1 tsp (leveled) chili powder (adjust depending on your tolerance for spiciness)
1 tsp (heaped) cumin powder
1 tsp (heaped) coriander powder
Salt to taste
Little oil


 On medium heat a little oil in a nonstick pan. Fry the onions till they become golden on the edges and translucent in the center. Then add the chopped garlic, and let it start to brown. As soon as it starts to brown, add the ginger and garlic pastes. Cook till the raw smell of the ginger and garlic paste start to go (about 2-3 minutes). Now add all the ingredients except the cauliflower. Cook them a little (about 3-4 minutes). At any time, if the food starts to burn or stick to the pan, add a teeny tiny bit of water. Next add the cauliflower, and mix in with masala. Add about 1/2 a cup of water and let it cook. Keep adding water, a little at a time, whenever it starts to dry up too much. When the cauliflower is cooked, let the remaining water evaporate (It should not be runny on your plate). Serve with hot chapati or bread. Bon Appetit!

Footnote: With Indian food, we often gauge the cooking by the smell of the spices. I know it sounds odd to some people, but the best way to tell that the spices in your pan are cooked, is see that the raw smell of the spices has gone. It's almost like they smell a little less sharper and pungent, than they do straight out of the packet. 

Monday, January 9, 2012

Baked Pork

The marinades I make for my meat are usually whimsical. I open the fridge, pull out what I think would go well, and do the same with the spices in my cabinet. I also very rarely measure things out for recipes like this, and so these marinades are based on an estimate. Feel very free to add or remove quantities or ingredients, I know I always do.

3 thick pork chops
1tsp dried rosemary
2tbs ketchup
1tbs Worcestershire sauce
1/2 tbs soy sauce
1/2 cup red or white wine (I usually use whatever is in the fridge)
salt
lots of pepper
about 1tbs chili flakes

Preheat the oven to 350 degrees Fahrenheit. Rub salt and pepper over pork chops and set aside till oven is ready. Meanwhile mix all other ingredients together in the baking dish. Then add the pork chops to it and marinade them well. Loosely cover dish with silver foil, and put into the oven for an hour. After an hour, remove foil and broil for 10 minutes till pork chops start to brown. Remove and serve with sides, or slice for sandwiches, or eat in anyway you choose! :)

Pork in Hoisin Sauce


I, often, get bored of eating the same food at home over and over again, and that pushes me try new and sometimes weird, stuff. Today's dinner is a pretty safe bet though. A couple of days ago I baked some pork in a flavourful marinade to put in our sandwiches for the weekend, but I think I made too much, so I'm converting it into Pork in Hoisin sauce. Click here to go to the Baked Pork Recipe!

1 bunch green onions (chopped)
1 yellow pepper (sliced lengthwise and then cut in half)
About 1tbs of Worcestershire Sauce
About 1tbs of Soy Sauce
3 heaped tsps of Hoisin Sauce
A little oil for frying
Baked pork cut into strips

Heat a little oil in a wok, put in the pepper, as it starts to soften add in the green onions, Let it brown a little, then add in the Worcestershire and soy sauce and let it cook for a minute. Add all the gravy from the baked pork. Let it start to simmer, then mix in the hoisin sauce and cook for a few minutes. Stir in the pork, switch off the stove and cover. Keep covered till you reheat to serve. (If you are serving immediately, then cover for 5 minutes). To serve, place a large leaf of lettuce on a plate, over which you put a cup of rice, and place pork  on side. Serve warm.

If you're the kind of person who likes to add finishing touches, then add a prig of parsley on top of the rice, just to make it pretty.

Pilot

For a long time people have been telling me that I should do this, so I'm giving it a shot! I'm devoting this blog to food, and anything to do with food! Reviews of restaurants, recipes I've created, or just what I've cooked today. I've already given you one reason why I'm writing this, the second is online recipes. I thrive on recipes I get off the internet, whether they've from food network, or an online magazine, or good old Google. But what I do with them is what I want to tell you about. I often tweak a recipe a little or just blend two or three of them together, and I'm always trying to make them simpler and quicker. So check in off and on, and don't hesitate to ask me questions - and I'll try and answer them all. Lastly, most foods you will see here are an ordinary meal; my meals focus more on taste and less on presentation.

Cheers!